Nearly every writer dreams of authoring a bestselling book, but for decades, it’s been nearly impossible to do this successfully without the assistance of a traditional publishing company.
Getting the attention of a big publishing company isn’t easy. It means sending out manuscripts, nervously waiting for a response that might never come, and trying to stay positive in the face of rejection. For the few who are lucky enough to move past this stage, there are still months of negotiations over the creative direction of your work and your cut of the profits.
Working with publishers is far from a dream-come-true, but what if you could skip the process altogether? What if you could write, edit, publish, and sell your own book—all without having to answer to the whims of gatekeepers?
In today’s creator economy, you can. Self-publishing tools are more widely available now than ever before. You just need to know how to use them.
How to Self-publish Your Own Book in 8 Steps
Step 1: Write a book that’s marketable
Entrepreneurs use market research to validate product ideas. This process involves closely examining competing products, evaluating their strengths and weaknesses, unearthing untapped niches, and establishing their ideal customer.
An author might scoff at the idea of performing market research, but the “author-prenuer” knows that understanding their audience early will make it easier to sell their book down the road.
You might already have books written, you may have a few book proposals, or you may be starting from scratch. Either way, using these methods of evaluating the market potential of your book before you begin the self-publishing process for the first time will help you establish a plan-of-action around marketing your book.
- Identify your genre. Genre is more than just a “category” for your book. Aspects like story structure, verbiage, writing style, and visual content can all differ depending on the genre of your book. For example, a children’s book might describe a rotting apple as “squishy” or “slimey,” whereas a murder mystery might describe it as “putrid” or “festering.” Considering the peculiarities of your genre will give you a better understanding of the audience you’re writing for.
- Explore how people talk about your genre. Browse message boards to learn more about how fans of your genre (and your potential buyers) decide what to read. What appeals to them about your genre? Are there any common frustrations with the genre?
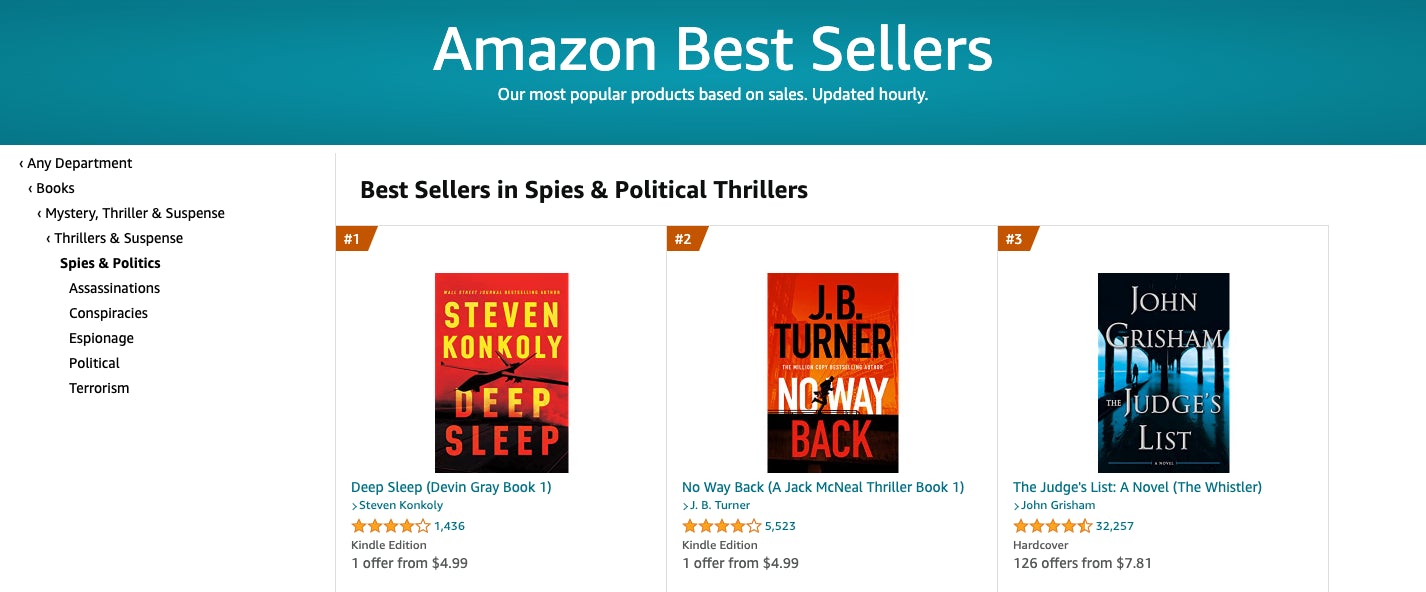
- Evaluate bestsellers in your genre. Conduct competitive analysis by evaluating the bestselling books in your genre on marketplaces like Amazon and the New York Times Best Sellers list.
- Evaluate your competitors’ positioning. Positioning is the messaging, values, and overall business strategy being pitched to audiences. Ask yourself what sets apart the most popular books in your genre. What do the titles, cover art, and synopsis pitch? What’s the hook that grabs the reader’s attention?
- Find out what’s missing. In the high-volume book publishing industry, marketing is all about differentiation. Put yourself in the shoes of your genre’s audience and ask yourself, what’s missing from these bestsellers? Are their stories left untold?
- If possible, identify a niche in your genre. A niche is a subsection of your genre’s audience. Niching is a great way to differentiate yourself in a crowded market and lower the scope of your competition.

If you already have a written manuscript in mind for self-publishing, consider its market potential now, before moving on to the next steps. You may be able to easily identify what sets your book apart, or you may want to make some revisions.
Either way, having an understanding of the audience for your book will help make future marketing decisions a lot easier.
Step 2: Edit like a professional
Self-publishers will have to compete in the same stores and marketplaces as traditional publishing companies, meaning your book needs to look just as refined and polished as it would coming from a major publishing house.
You might not have the vast well of editors that a large publisher has, but that doesn’t mean you can’t create a product that can compete.
Start by editing the manuscript yourself
Before handing your first draft off to anyone else, read it yourself, start to finish, as though you’re a member of your intended audience. It’s easy to get lost in the weeds during the writing process, and a start-to-finish read-through will help you to understand how your book translates as a whole.
Once you have a manuscript that’s ready for another set of eyes, put your entrepreneurial hat back on and start getting feedback from prospective fans.
Get feedback from your intended audience
During the product development process, entrepreneurs polish their product by getting feedback from target audiences, with the goal of improving the usability of the product. This is important for self-published books as well.
Before sending the book off to a professional editor, provide copies to people and have them give you feedback. It’s important that the feedback you get comes from the intended audience of your book.
Browse message boards pertaining to your genre, send your manuscript to friends and family (if they fit your target audience), and get as much feedback as you can about your manuscript. The point of this stage isn’t to fix mechanical errors, or typos, but to get an overall read on the book’s marketability as a whole.
Have your manuscript copy edited by a professional
Copy editing is a very meticulous process that involves the line-by-line revision of a manuscript with the intention of improving readability and making sure the piece is free of grammatical and factual errors.
While you should do your own copy edit before passing your manuscript along, it’s important to have a professional take a look and gain outside perspective on your book’s content. It can sometimes be difficult for writers to recognize issues with the readability of their own work.
Where to hire a freelance editor
Hiring a freelance editor lets self-publishers work with a professional editor within the confines of their budget. There are a number of places where you can hire freelance editors to help edit your work. Freelancing sites have a wide variety of freelancers, with varying costs and degrees of experience:
- Reedsy. Reedsy is a freelancing site specifically dedicated to matching up indie authors with freelance editors. What makes Reedsy unique is the ability to hire editors that specialize in your specific genre.
- Upwork. Upwork specializes in connecting businesses with a wide variety of freelance talent, including editors and proofreaders. Upwork has search filters that allow you to view freelancers by hourly rates, so it’s easy to work within your budget.
- Fiverr. Fiverr bills itself as the world’s largest marketplace for digital services. Users are divided into “buyers” and “sellers.” Sellers offer a wide variety of services, including proofreading and editing.
- Guru. Guru allows business owners to create job postings for freelancers to explore. Freelancers respond to posts quoting their fee and business owners can evaluate applicants and select the one that best fits their needs.
Once you have a freelance editor, you can have them professionally edit your piece. From there, you will have a completed, professional manuscript. Next, you’ll need to move on to cover design.
Step 3: Develop an eye-catching book cover design
You shouldn’t judge a book by its cover, but most people will. Your cover acts as your book’s primary visual aid to users browsing online retailers, marketplaces, your online store, and just about every other place your book will be sold.
Should I hire a professional designer?
Author-preneurs wear many hats and graphic designer is often one of them. Designing your own cover will take a bit of time, but it can also save a lot of money. The answer to this question depends entirely on how experienced you are with the task.
Whether you design the cover yourself or hire a freelancer, you’ll need to think like a marketer when it comes to evaluating your cover design. Here are some things to keep in mind:
- Use inspiration to inform your decision. Gather together a couple of cover designs from successful books in your genre and evaluate what works best for them. Why is one cover more appealing than another? What does the content of the cover say about your book?
- Think in terms of thumbnails. When customers browse your online store, Amazon, or physical bookstores—your cover art will be significantly reduced in size. Remember that small details of your book cover design might be missed in this context. During the design process, try to remember to view your cover in its thumbnail form to make sure prominent details aren’t missed and that the cover doesn’t look too busy.
- Make your title legible. An eye-catching cover design could go to waste if readers aren’t able to quickly and easily associate it with your book title. Having the title featured prominently will help readers associate the image with the name of your book and make them more likely to remember it.
- Keep the spine and back cover in mind. Although the spine and back cover may not be visible in thumbnails, they will be visible in the physical incantation of your book. A lot of readers care about what the spine looks like on their bookshelf. Follow the same aesthetic as your cover, and make sure the design is coherent.
If you’re looking to hire a designer, you can use freelance services above that you used to hire an editor to also hire a designer:
Free tools for designing your own cover
If you have design experience and want to try your hand at designing your own cover, here are some free design tools you might consider using:
At this point, you should have a well-edited manuscript and a strong cover design, but there are still more steps to bringing all those elements together in the creation of a physical product.
Step 4: Decide which self-publishing platforms you’ll be using
A self-publishing platform is a tool used to turn all the elements of your book into a physical product and distribute it to buyers and retailers. The self-publishing company you use will affect your distribution channels, so at this point it’s important to start thinking about how you want to sell books online.
Self-publishing with print on demand
Print on demand is a fulfillment method wherein your books are printed and shipped at the point of sale. This means that you don’t need to print a bunch of copies of your book, hold them as stock, and ship them yourself.
Print-on-demand books are perfect for self-publishers, because it’s low cost and saves time by letting you outsource the manufacturing and distribution of your products.
Selling on Amazon using Kindle Direct Publishing
Kindle Direct Publishing (KDP) is Amazon’s self-publishing platform that allows users to print their books on demand at the point of sale. Amazon accounts for about 50% of the printed book market. Readers are used to Amazon’s interface, making it easy for them to navigate and find your book.
On top of this, Amazon will suggest your book to readers who its algorithm thinks might be interested. Although KDP will directly upload your book to Amazon, you don’t necessarily need to use it to sell printed books.
How much does it cost to use KDP?
Since KDP uses print-on-demand fulfillment, charges for using KDP are only incurred once you’ve sold a book. Paperbacks sold on Amazon marketplaces using KDP are subject to a 60% royalty rate, meaning you earn 60% of the listed price.
That being said, printing costs (which can vary based on your paper type and number of pages) are also deducted from your total. Thankfully, Amazon has a handy printing cost and royalty calculator that will give you an estimate of the total amount in royalties you can expect to receive.

One downside to note about KDP is the exclusivity clause: if you sell ebooks on Amazon using KDP, you won’t be able to sell the same ebooks elsewhere. Physical books sold through KDP can still be sold on other platforms, however.
Selling in-store with Lulu and Shopify
Lulu is a self-publishing platform that provides tools for printing and distributing your very own books and ebooks. Lulu offers a wide variety of sizes, bindings, and page types that give you a ton of options for developing your manuscript and cover into a physical product.
What makes Lulu advantageous is the Lulu Direct Shopify app, which easily integrates with your Shopify store. Using the Lulu app on your Shopify store, you can have books printed and shipped at the point of purchase, automating the process of logistics.
Other self-publishing platforms
There are a number of self-publishing companies that allow users to create physical copies of their books and sell them via major retailers. Most have a print-on-demand option for selling on Amazon, but this might not be available for selling in-store.
If you decide to use a self-publishing platform other than Lulu, you’ll need to have copies of your book printed, stored, and shipped in the traditional fashion, meaning there might be more overhead costs than with a print-on-demand service.
- Reedsy. On top of being a platform to find freelancers, Reedsy also offers self-publishing services. Its book-formatting tool helps self-published independent authors create professionally designed ebooks and printed book files for free.
- IngramSpark. IngramSpark offers tools for designing your print books and built-in distribution features to over 40,000 retailers and libraries.
- Blurb. Blurb is a platform that offers a ton of digital software for creating your book layout and selling it through major retailers like Amazon. Blurb’s tools are especially useful for large photo books with more unique page-to-page design.
Step 5: Formatting your book
At the formatting stage of self-publishing, you’ll be putting the finishing touches on your product, making sure it has all of the accoutrement of a professionally published book.
The reason the formatting step comes after the find a self-publisher step is because self-publishing platforms typically have their own built-in layout and formatting features. The tools you use might vary depending on the platform you’re using, but the end product is the same.
How book formatting works
Self-publishing platforms like KDP require users to upload two distinct files. The first is the manuscript file, which includes all of the interior pages of the book and the second is the cover file, which contains the outside of your book: the front cover, spine, and back cover.
Formatting your manuscript file
Though your manuscript may be written and edited to perfection, there are still a few formatting choices to make as you begin to prepare it for publication.
Set your trim and margins. Your trim is the height and width of your pages. Self-publishing platforms typically have a number of page sizes to choose from, but you still need to set margin sizes.
Front matter
A book’s front matter is all of the pages that come before the start of your manuscript. Books typically have five types of front-matter pages:
A book’s front matter is all of the pages that come before the start of your manuscript. Books typically have five types of front-matter pages:
- Half-title page: Often the very first page of a published book, the half-title page is a right-facing page that contains the book’s title and nothing else—not even page numbers.
- Title page: Your title page doesn’t include page numbers either, but it does typically contain the author’s name and a subtitle. Publishing companies will also usually include their logo here, but for self-publishers, a logo is optional.
- Copyright page: Your copyright page should always fall on the first left-facing page on the reverse of the title page, and contains all of the book’s copyright information. If you’re not sure what to include, here’s a handy template from publisher Scribe.
- Dedication page: This falls on the next right-facing page and usually doesn’t include page numbers or headers. Dedication pages should be short, usually one or two sentences.
- Table of contents pages: Table of contents pages typically list the chapter and section titles of your book, along with the page numbers where they appear.
Body matter
A book’s body matter contains all the text of your chapters. Body matter pages start with the first chapter on a right-facing page.
- Chapter title page: Your chapter title page appears at the start of each chapter in your book. Chapter title pages do not include page headers, but they do include page numbers.
- Body pages: Each page of your book that does not start a chapter will be a body page. Body pages typically include a header: usually if they’re left-side pages, the header will be the author’s name; on the right, the header will be the book title.
Back matter
Your book’s back matter will include all of the pages that come after the chapters of your book. Here are the back matter pages to include:
- Bibliography and reference pages: These pages may not be required for fiction books, but non-fiction books typically require attribution pages.
- Author bio page: Contains a photo of you, the author, alongside a brief biography.
- Index pages: Non-fiction books that cover a wide range of topics typically include an index page that lists topics in alphabetical order next to the page numbers where these topics are discussed. If you include index pages, they will come last.
The last element your book will need to have is an International Standard Book Number (ISBN).
What is an ISBN?
An ISBN is a 13-digit code that uniquely identifies each published edition of your book, along with its publisher and physical properties.
They’re useful because they provide a universal reference number for your book that will work across many different platforms, libraries, and marketplaces. They also act as proof of ownership over the content of your book, so they’re important for self-publishers to have.
How do I get an ISBN number?
Most self-publishing platforms, including Kindle Direct Publishing, will provide you with a free ISBN number for your book when using their platform to publish. If your self-publishing platform does not, you can acquire a universal ISBN via myidentifiers.com.
Step 6: Launch your book like a store launches a product
If you want to set yourself up for success, your next task will be to plan a product launch. You may not have the experience of a professional publishing house, but you’ve prepped for marketing by creating a book that has an audience you know inside and out.
There’s a lot to consider before a book launch. Let’s go over some important steps:
- Make sure your Amazon sales channels work. Amazon is an incredibly important platform for selling books. Whether you sell on Amazon via KDP or are using a different self-publishing platform synced with Amazon, you’ll want to make sure you’re able to accept payments via Amazon. Go through with a test purchase, and let a copy of your book get sent to you as though you’re a customer.
- Set up an author website with an online checkout. Your book should have a “home base” for all your sales channels and social media content to lead to. It will make it easier for users to find more information about you and help people get in contact with you for interviews and other promotional opportunities.
Start your free 14-day trial of Shopify—no credit card required!
- Prepare standard pages on your website. Your author website should include a homepage, About Us page, Contact page, and a product page for your book. Additional blog content and books can be added after launching, but you’ll want to have these pages complete before opening your store.
- Set up a way to capture visitor email addresses. Email marketing is a very powerful tool for building an audience. Use an email marketing app like Shopify Email, Seguno, or Klaviyo to send notification emails and provide visitors with a way to receive updates about you and your books.
- Install an analytics tool. Website analytics can give you valuable insight into visitor behavior and help make improvements to your online store. Shopify has built-in analytics reporting, but you could also set up a third-party analytics tool like Google Analytics.
Once your book is formatted and your sales channels are set up, users will be able to purchase your book. Now it’s time to show them how.
Step 7: Market yourself on social media
You’ve written and edited your book like a pro. You’ve tested all your sales channels and everything functions seamlessly. You’ve got a great looking website and a great looking book, but how do you find customers?
Social media provides a huge marketing opportunity to small businesses, and self-publishing authors are no exception. Social media offers low-cost access to huge audiences, and having a good social media marketing strategy will help build an engaged audience that can boost book sales and help widen the reach of awareness of your book.
Growing your social media following should be an ongoing process, something you’re doing on a consistent basis alongside writing, editing, and publishing your works. For self-publishing, here are a few good ideas for social media content you might try to promote your book:
- Share excerpts across social media platforms. Give users a sample of your writing to get them hooked, then direct them to purchase your book to read more.
- Encourage user reviews on Amazon. User reviews help boost your visibility on Amazon. Encourage early purchasers to leave reviews to help build the visibility of your book.
- Start a Facebook ad campaign. With Facebook ads, you can reach your ideal customers based on what they like, their interests, and their behaviors. Set aside a Facebook ad budget to help bring awareness of your book to users most likely to purchase.
- Collaborate with social media influencers. Work with influencers that have a crossover audience with yours to build awareness of your book with an audience that might enjoy it.
- Reach out to publications and podcasts. The literary world is ripe with online publications and podcasts that cover a wide range of literary genres. Follow publications and podcasts within your niche and see if they’re willing to offer an interview.
- Write on your blog and share articles on social media. Since you have a website, why not publish blog articles and share them on social media? Audiences that enjoy your writing will be far more likely to purchase your book.
Growing your audience on social media takes some time, but as more and more audience members become familiarized with your work, your online book sales will grow.
Step 8: Start work on your next book
Self-publishing authors must act as both authors and entrepreneurs. In the early stages of a business, with fewer employees and a lower budget, entrepreneurs tend to wear many hats.
At times, they must act as marketing strategists, social media managers, web designers, product developers, shipping coordinators, customer service representatives, and everything in between.
For self-published authors, the journey is the same.
Don’t be discouraged if your first launch doesn’t skyrocket you to the New York Times bestseller list. Few authors, whether self-published or not, reach the height of their success after publishing their first book.
Continue boosting your social media presence and building your audience. Each interaction on social media will help build up your online profile a little more. With each book you release, you’ll gain a deeper understanding of your audience and become more accustomed to the self-publishing process.