When it comes to online shopping, you only get one chance to make a first impression, and having high-quality product photography can go a long way toward making sure it’s a great one. How you style your product, the lighting and background in your studio, your camera settings, the angles you shoot from, and your post-production processing will impact whether your product images turn visitors into customers.
Footwear photography comes with its own special set of dos and don’ts. So start your next photography session off on the right foot with these tips.
Style your footwear for product photography
Give your footwear form and help it stand—you don’t ever want to let footwear droop. Limp, lifeless footwear is unflattering and conveys little information to the customer. Instead of trying to come up with a new arrangement no one has ever seen before, make it easy for shoppers to visualize wearing your shoes. The idea is similar to using a ghost mannequin for clothing photography.

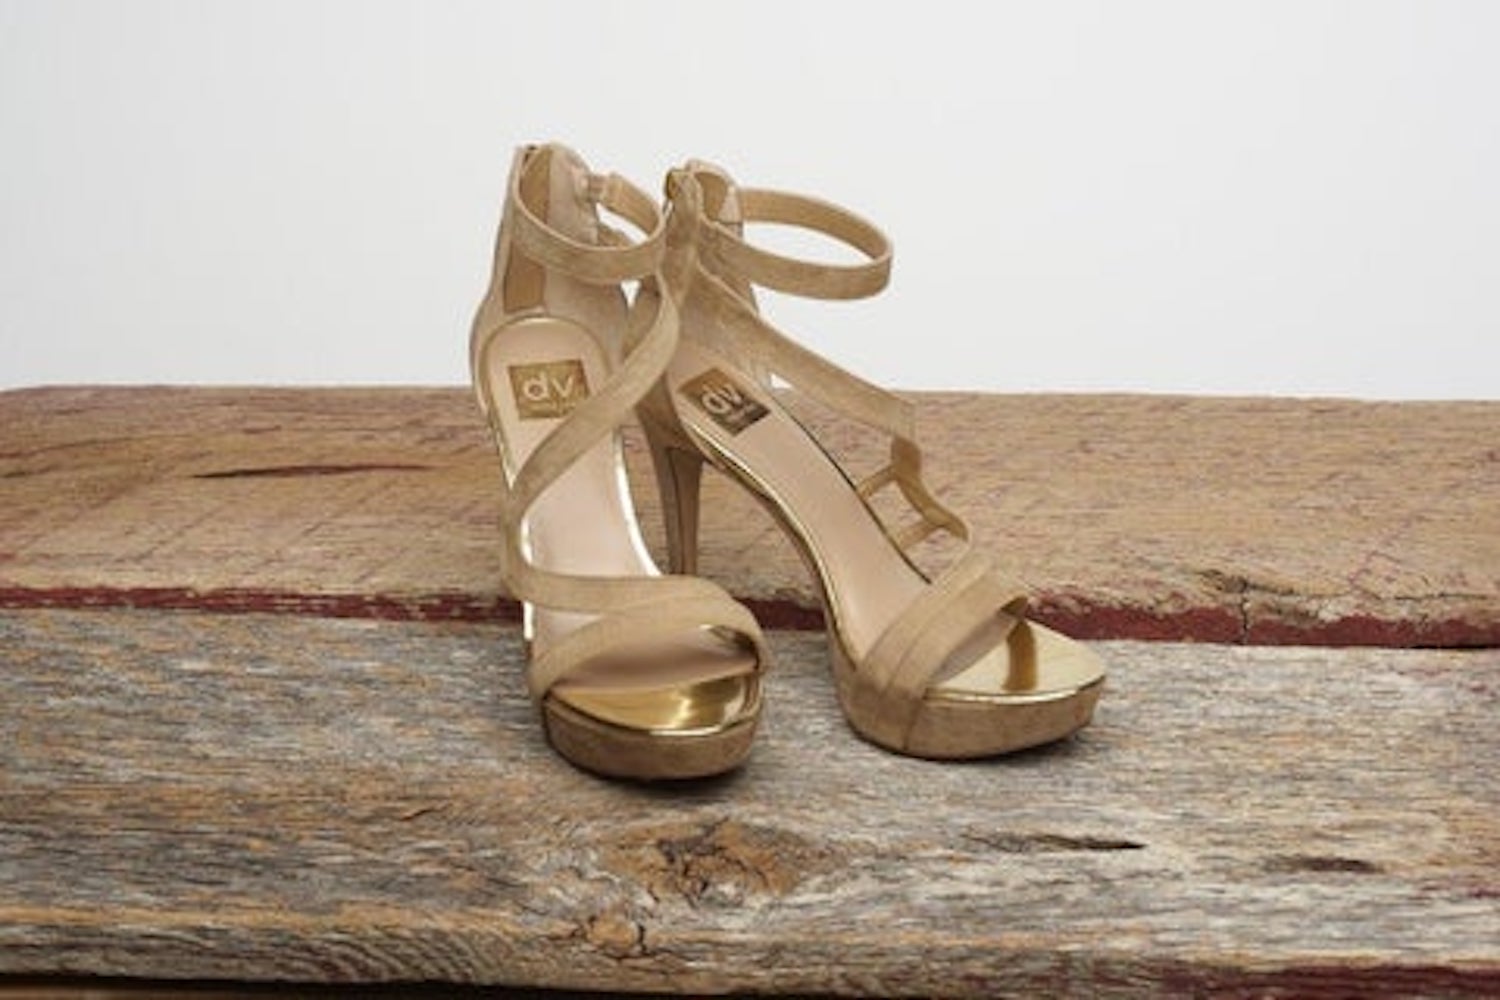
Position your footwear to look like it’s being worn.
Make sure every piece of footwear looks its best by creating the illusion that the shoe is being worn. This shows both the item’s true shape and allows your customer to envision themselves wearing it. You can communicate shape by stuffing it with crumpled paper or tying dental floss to the shoe’s straps to hold them up in the frame.
 Dental floss lifts straps and is easy to remove in post-production.
ILYSM sells unique vegan split-toe shoes that resemble a cross between a sneaker, a slipper, and a sock. Because of its material and design, the footwear likely doesn’t have form on its own. But as you can see in the product photos, the brand has taken steps to fill out the shoe and photograph what its shape would look like if a person were actually wearing it.

Choose the right backgrounds for footwear photography
In most types of product photography, cluttered backgrounds are a big no-no. Busy backgrounds distract your customers from what you actually want them to look at—your product.
A bold background pulls attention away from your product.
Instead, opt for a plain white background. Keep everything in your frame simple and clean to draw maximum attention to your footwear. It’s always best and most convenient to photograph each product alone, with a clean white background behind. You can go for a stark white, which third-party marketplaces like Amazon require, or a gray or off-white hue to create a different look and feel.

Not every shoe photo needs a plain background—there’s a time and place for backgrounds too. Lifestyle or contextual photography will display your shoes on models or out in the real world. Isleñas showcases its shoes on white backgrounds and in context so shoppers can get a feel for how the shoes would look paired with an outfit.

Perfect your footwear photography lighting
Lighting is one of, if not the most, critical parts of product photography. Your footwear photography needs appropriate lighting or your shoes won’t look appealing. Harsh, direct lighting that casts deep shadows is the worst type of lighting for product photography.
 The wrong type of lighting can highlight imperfections and warp colors.
Natural light is one of the best and cheapest options available. When possible, take your photos inside next to a large window, diffusing sunlight with a sheet if it’s too strong. For more control and longer hours, rent a studio softbox setup for soft artificial light. If you need to take photos outside, find a thickly shaded area to get the most even light. Try to shoot in the morning or evening—always avoid taking outdoor photos midday.
 Take photos that put your product in the right light.
Adjust and readjust your frame
Get the focus right
Blurry and soft focus can be artistic in many types of photography, but it’s a nuisance to customers in product photography. The more your image is out of focus, the less your customer will see of your product.

Soft focus makes it harder to see the details in a photo.
Be sure to use a higher aperture like f/11 on your DSLR camera to get every aspect of your footwear in focus. It’ll also help to use a tripod, since it minimizes camera shake to give your images maximum crispness.

Show every detail in full focus.
Getting your footwear in focus is also important for zoom views. Many customers want to be able to zoom in on your product photos so they can get a closer look at fine details. With an out-of-focus shot, those details won’t look as clear. See how crisp the details are in this zoomed-in view of a Vessi sneaker?

Set your shadows
Rather than removing shadows in post-production, try to get it right when you shoot. It’s standard best practice in ecommerce to place products on a pure white background in post-production. However, if you remove the whole background including the shadow, you’re often left with a final image that lacks depth, like this:

Removing the shadow creates what we call “the fridge magnet effect.”
Footwear images in particular benefit greatly from a little bit of natural shadow. Retaining the natural shadow in post-production grounds the item in the frame and creates a much more professional result.

It’s not always going to be possible to get natural shadows. In some cases, you’ll need to add a drop shadow in post-production. This technique is common for white background photos in particular.
The below product images from CARIUMA appear as though they could have had a drop shadow added in post. Note how the shadows help the white sneakers stand out against the white background while also giving the frame dimension.

Shoot the right angles
One of the biggest mistakes in product photography is displaying very few angles of the product on the listing. Customers want to see every side and face of a product as they decide whether or not to invest in it.
Capture as many angles as possible. Take straight-on side shots, shots from the front, shots from the back, the top view, angled side shots, detail shots, and all variations of those suggestions—as long as the angles are flattering. Lilith even shows the bottom of some of its footwear products. While you may not do this for your footwear, the bottoms of its shoes are stylish and of interest to Lilith customers.

Crop and edit your footwear photography
Inconsistent cropping is one of the easiest mistakes to make in product photography. Images on your website are side by side, and inconsistencies attract the eye. Your customers will notice if some of your footwear images are more zoomed in than others, and they will notice if products the same distance away from the camera are higher or lower than each other. They will notice differences in lighting, differences in focus, and so on. All such inconsistencies divert attention from the product.

Don’t let inconsistent cropping cause misalignment.
Develop a cropping template with strict guidelines to keep your images consistent from frame to frame. Abiding by a template will speed up your shooting and post-production workflow as well as enhance the professional appearance of your website.
Many online channels require certain web standards for cropping and sizing, so take note of their image guidelines and incorporate them into your template.

Use software to crop consistently and align your images.
Notice how the shop page for INEZ shows its footwear with the same crop and background. This makes for a clean and approachable shopping experience that lets customers quickly compare different products at a glance.
Follow our tips and find do-it-yourself success
Don’t be afraid to experiment. Do follow in our footsteps, so you can avoid making painful and time-consuming mistakes. Think about how you style your footwear, what you choose for your background and lighting, and which post-production techniques you use. You’ll give your product its best chance of getting purchased.
Ready to create your first business? Start your free 14-day trial of Shopify—no credit card required.

About The Author
Thomas Kragelund is the CEO and founder of Pixelz, a leading product image solutions partner for internet retailers, bloggers, designers, photographers and webmasters worldwide. He has been working in ecommerce for the last 15 years. Sign up today and get 3 product images edited for free.